Car mounts for action cameras: when a suction cup, magnet or clamp makes sense
A car mount is only as good as the surface, the load and the route. Here is how suction cups, magnetic mounts and clamps differ before an action camera ends up on the road.

A camera on a car looks simple until the first bump, a hot windshield or a gust around a truck turns the mount into the weak link. The useful question is not which mount has the most impressive load rating on its listing. It is whether the complete setup — mount, arm, adapter, camera and any battery case — suits the surface and the kind of driving being filmed.
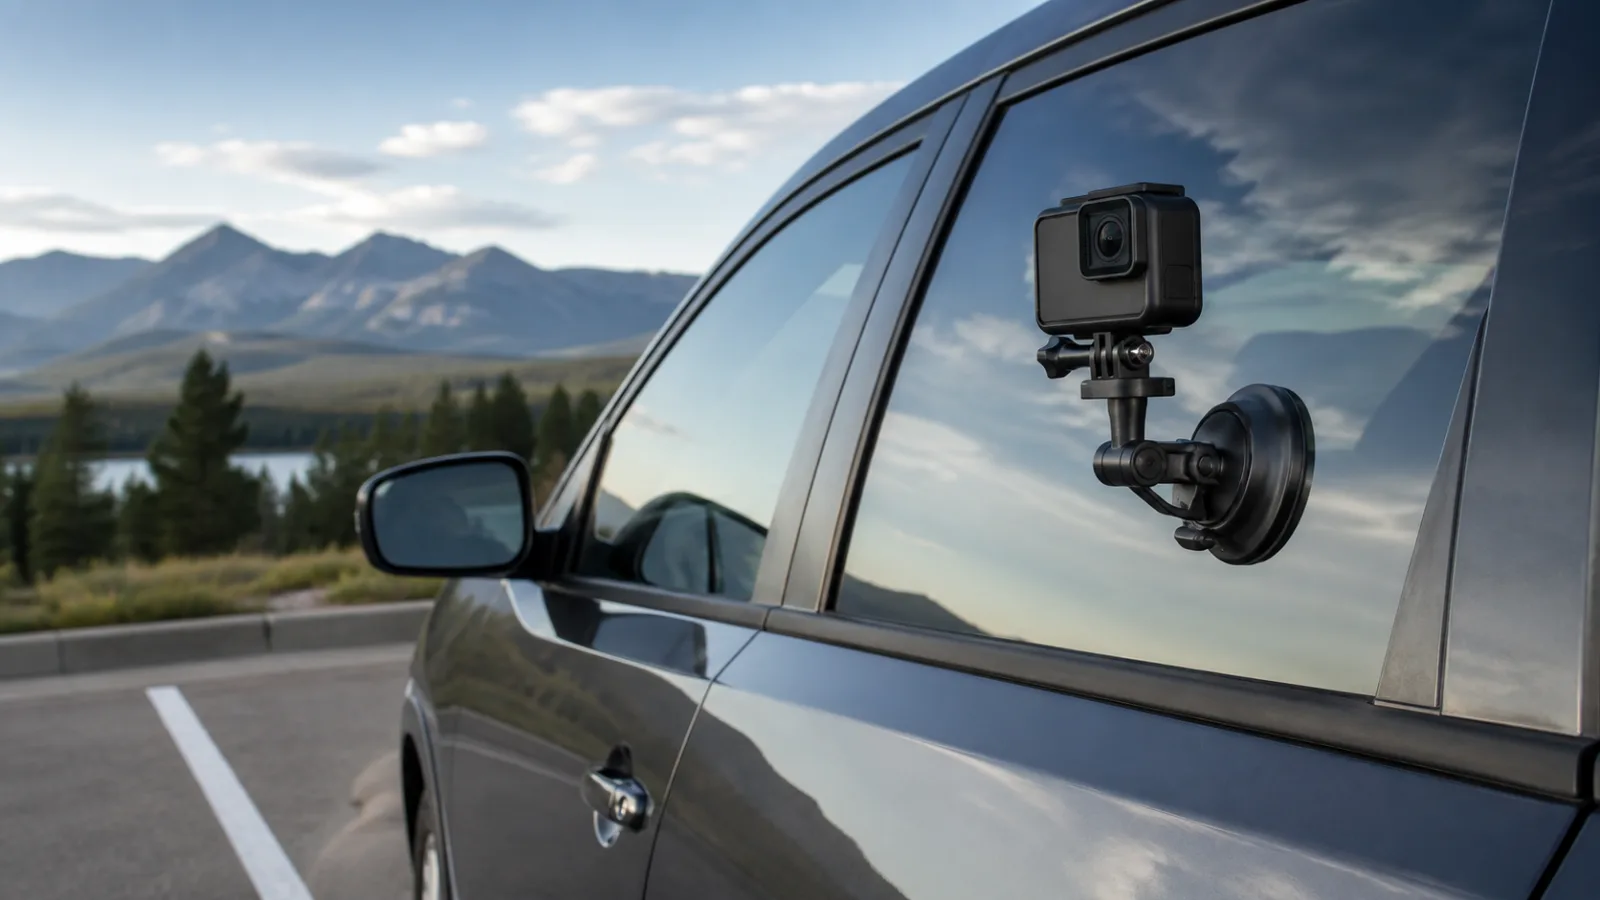
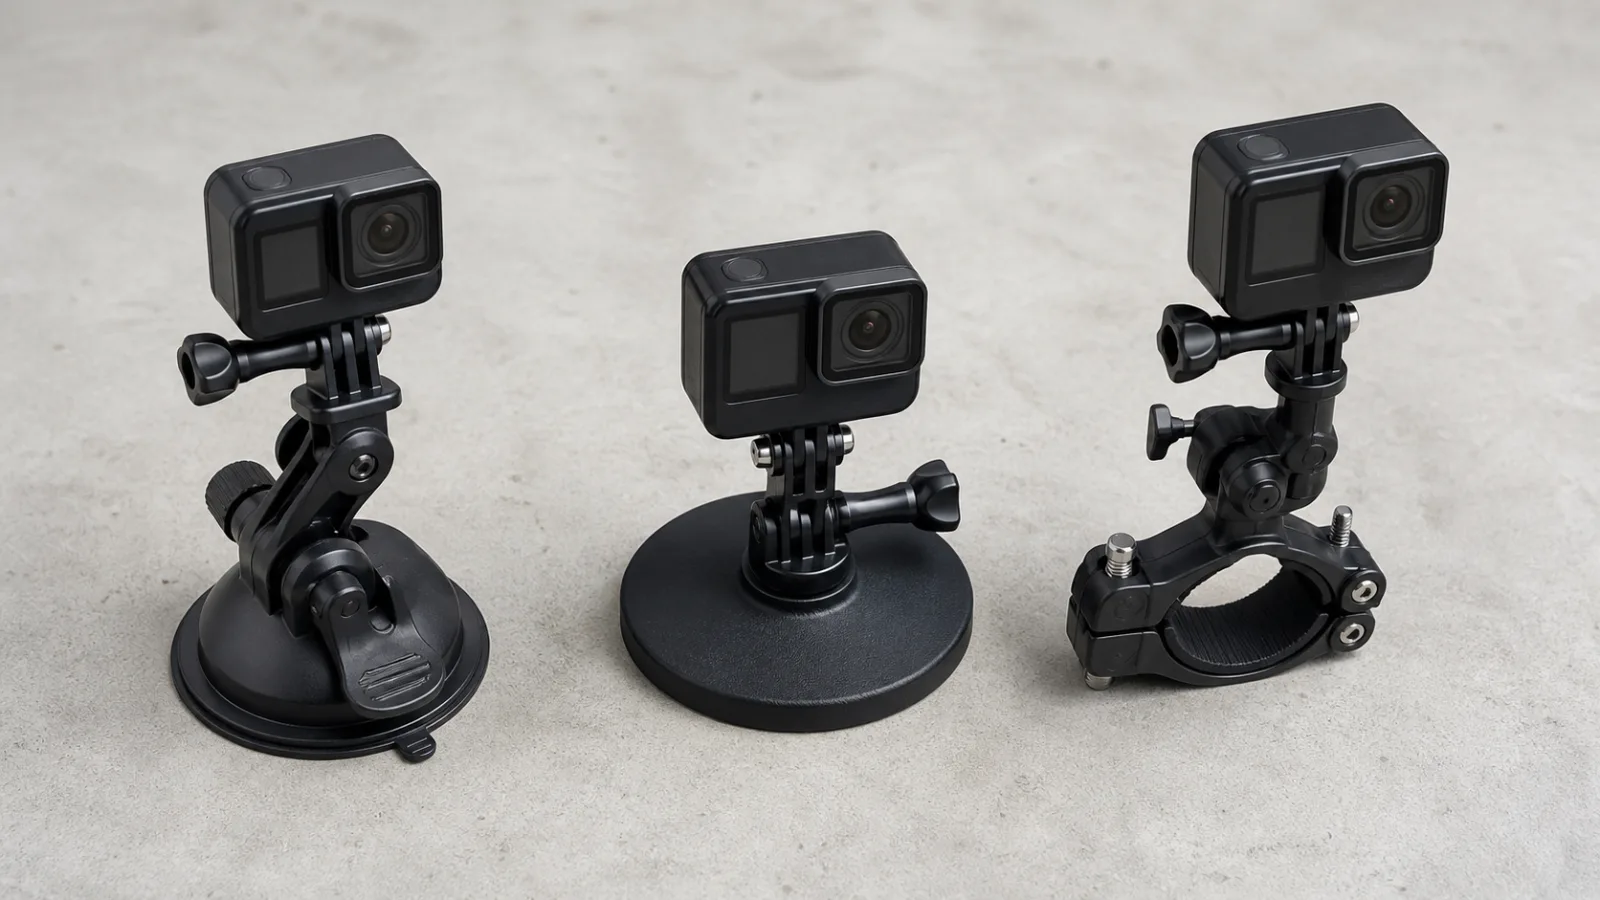
For a GoPro, Insta360 or a similar small action camera, three families cover most jobs: suction cups on smooth panels or glass; magnetic bases on suitable steel bodywork; and clamps fixed to a rack, roll bar, headrest post or another solid tube. Adhesive mounts and purpose-built vehicle mounts sit beside them, but they are not interchangeable substitutes.
This is not a promise that any camera will stay attached at speed. Manufacturers’ product pages describe their own hardware, not every combination of extension arm, camera, weather and road surface. Check the camera maker’s mounting guidance, obey local road rules, and do a low-speed test before relying on a new arrangement. The U.S. National Highway Traffic Safety Administration also treats visual-manual distraction as a real driving risk: frame the shot and start recording while parked, rather than adjusting it in traffic.
Suction cup: the most flexible exterior mount, with a demanding surface requirement
A quality suction cup is usually the sensible first purchase for filming a car from the outside. It can move from windshield to side glass to a smooth painted panel in minutes, and it does not leave permanent adhesive behind. GoPro’s Suction Cup is a representative example of the category: it uses a locking suction system and is sold for attachment to cars, boats and motorcycles. The important part is not the brand name; it is a clean, smooth, non-porous contact patch and a mount rated for the intended use.
The good side is framing freedom. A short arm on a windshield can show the road and cabin. On a clean door or rear hatch, a suction cup can produce a low, close-to-body angle that makes an ordinary road look fast without placing a camera far from the car. It is also the easiest style to remove at a fuel stop or when parking.
Its limits are equally ordinary and easy to overlook. Dust, wax, rain, textured plastic, a sharp panel curve and old rubber can all compromise the seal. Heat matters too: a mount that felt secure in a cool garage should be rechecked after sitting on a sun-heated panel. Long extension arms add leverage, so the force on the cup is much greater than the camera’s bare weight suggests. A 360 camera adds another issue: the camera may be light, but its tall body and a long invisible-selfie-stick-style arm can shake noticeably.
For this reason, a suction cup is best used close to the body with the arm as short as the shot allows. Clean and dry both the cup and the mounting surface, press it down firmly, lock it, then pull gently to check the seal. A tether is cheap insurance for exterior work, provided it cannot whip against paint, wheels, controls or other road users. Recheck the setup at every stop; that is more valuable than trusting a one-time tug test.
Who should consider it: drivers who want occasional exterior and interior angles, have smooth glass or paint available, and are prepared to inspect the mount. Who should skip it: anyone trying to attach to a heavily curved, dirty, matte, vinyl-wrapped or textured surface, or anyone who wants to leave a mount installed for weeks without checks.
Magnetic mounts: fast and tidy, but only for the right metal
Magnetic camera mounts are appealing because setup is quick: place the base on a steel panel, set the angle, and record. They can be excellent for a short static shot on a clean ferrous body panel, particularly where there is no good suction-cup surface. The catch is hidden in the phrase “metal car.” Many exterior panels and trim pieces are aluminum, plastic or composite, and a magnet cannot make a reliable bond to them. Even when a refrigerator magnet sticks, that does not establish that a camera mount will hold under vibration and wind load.
Look at the whole magnetic system. A base with several magnets, a broad rubber contact pad and a short camera mount is inherently more stable than a tiny magnetic puck carrying an articulated arm. The advertised pull force is normally measured straight off a thick, clean steel plate in controlled conditions. A car door is painted, curved, vibrating and subjected to sideways forces; that is not the same test. Shear force — the tendency to slide down or sideways — is often the practical failure mode.
Magnets also bring paint and placement issues. Grit caught between pad and panel can mark clear coat, so clean both surfaces. Avoid locations near moving parts, panel gaps, hot exhaust areas and any area where the camera could obstruct lights, a plate or the driver’s view. Do not assume a magnetic base is appropriate for every vehicle just because a social video made it look effortless. The camera’s position should not create a loose object hazard if it shifts.
Magnetic mounts make the most sense for short, deliberate exterior takes on confirmed steel, with a short setup and a safety tether where practical. They are less persuasive for rough roads, long motorway runs, heavy cameras or rigs with long arms. A suction cup or a rigid clamp is usually the more conservative choice when the camera must stay put for an extended drive.
Who should consider it: people who need quick changes between verified steel mounting points and want a compact, low-profile rig. Who should skip it: owners unsure of their body-panel material, users adding long arms or 360 cameras, and anyone filming on poor surfaces or in wet, dusty conditions.
Clamps: the strongest option when there is something genuinely solid to clamp
A clamp does not depend on a vacuum seal or magnetism. It grips a tube, bar or edge, which makes it the better category for a roof rack crossbar, a roll cage, a sturdy headrest post or a purpose-designed accessory rail. Camera brands and mount specialists sell clamp systems with ball heads and interchangeable adapters; their advantage is mechanical security and repeatable framing.
That advantage depends completely on what is being clamped. A roof rack crossbar can be suitable if the rack maker permits accessories there and the camera does not interfere with cargo. A thin decorative rail, fragile trim, a brake line, a wiper arm or a part near a deployed-airbag zone is not an improvised camera anchor. Inside the cabin, mounting to the driver’s seat headrest can give a useful over-the-shoulder view, but it must not hinder seat adjustment, seatbelt operation, rear visibility or passenger space.
A clamp deserves the same restraint as a suction cup. Use a protective pad if supplied, tighten it according to the maker’s instructions, and keep the camera near the clamp instead of building a long vibrating boom. For exterior use, inspect it after the first few minutes of driving. On a roll cage or track vehicle, follow event and vehicle rules; a track organiser may have its own requirements for tethering and placement.
Who should consider it: drivers with a real round bar or rack point, or creators who value stable, repeatable angles more than quick relocation. Who should skip it: anyone relying on cosmetic trim or an unknown edge, and ordinary cars with no structural point that can be accessed without affecting safety equipment.
Adhesive and dedicated mounts: useful fourth options, not a universal answer
An adhesive mount can be tidier than a suction cup when the angle will be used repeatedly. It is a commitment: surface preparation, adhesive cure time and removal all matter. Do not treat a newly applied adhesive pad as ready immediately, and do not attach one to a surface that flexes, gets very hot or is hard to clean. Adhesive mounts are often better for helmets, flat interior trim or a carefully selected permanent camera location than for a casual exterior car shoot.
A vehicle-specific mount is worth considering when the camera is primarily a dashcam or a fixed cabin camera. It may place the device more cleanly and avoid a loose arm on the glass, but verify compatibility with the exact car and camera. It must not sit in an airbag deployment path, block sensors or significantly obstruct the road view. For panoramic 360 footage, a dedicated clamp-to-rack solution can be cleaner than trying to make a long arm work from a small magnet.
What reviews can and cannot tell you
Marketplace reviews are useful for spotting recurring, concrete complaints: a suction lever that loosens, a ball joint that creeps, a thread that strips or a magnetic pad that scratches paint. They are much less useful for proving a mount is safe at a particular speed. A five-star photo on a parked car does not test wind, vibration, rain or an abrupt manoeuvre. Likewise, a dramatic failure clip may show misuse, an overloaded arm or a dirty surface rather than a flaw shared by every unit.
When comparing inexpensive marketplace options with an established-brand mount, separate the official specification from user reports. Check the stated camera compatibility, thread or adapter type, load guidance and intended surface. Then read the lowest-rated reviews for the same product variant, looking for repeatable details rather than broad claims such as “fell off.” Product listings often reuse photos across variants, so verify what is included: an action-camera fork adapter, a 1/4-inch screw, a ball head and a tether are not guaranteed to arrive together.
Price is especially hard to state responsibly in this category. Marketplace prices change by seller, region, tax, coupon and bundle, while branded mounts are sold through different channels. Instead of treating a crossed-out price as evidence of value, compare the total kit needed for a secure shot. A cheap base that needs a separate adapter, tether and replacement arm may not be cheaper than a complete mount.
A practical choice before buying
Choose a suction cup if you need flexible angles on clean, smooth glass or paint and will check it regularly. Choose a magnetic base only after confirming a clean steel contact point, keeping the rig short and accepting that it is best for controlled, short takes. Choose a clamp when the car has a legitimate robust bar or rack point and stability is the priority. Choose adhesive or a vehicle-specific solution when the camera position is fixed and the mounting location has been assessed carefully.
Whichever route you take, build the rig on the ground. Fit the camera, battery, case and adapter you will actually use; shake the assembly by hand; make sure buttons, doors and lenses remain accessible; and make a short low-speed test recording. Review the footage for vibration before committing to a longer drive. Stop to adjust it rather than reaching for the camera while moving. A slightly less dramatic angle that stays attached is the better shot.
Sources and further reading
- GoPro Suction Cup product information for the manufacturer’s stated intended vehicle uses and setup context.
- NHTSA: Distracted Driving for the safety context around operating or adjusting recording equipment while driving.
- GoPro mounting accessories to check current compatible attachment types and product instructions.
- Insta360 support for camera-specific mounting, handling and accessory documentation.
Related articles

Official phone cases are now gadgets, and they deserve gadget-level skepticism
Pixel case and Pixelsnap complaints show why a $50 official case is no longer a harmless checkout add-on. Treat phone accessories like devices, not decorations.
Apple’s September 2026 devices are in stores. The first-day setup is where the upgrade earns its place
The iPhone 18 Pro, Apple Watch Series 12, Ultra 4, and AirPods 5 are now available. The practical decision is not which launch feature sounds best, but which setup, transfer, health, audio, and return checks prevent an expensive mismatch.

APRS and SSTV from a balloon: a receive-station checklist before the next club launch
A recent Kopernik Observatory balloon request is a useful reminder: clean VHF audio, correct mode settings, UTC logs and receive-first discipline matter more than expensive gear.

Los Angeles to Vancouver for $188: the fall budget works only if you price bags, rain and airport transit first
A cheap LAX-Vancouver fare can still make a useful autumn city break, but the real budget depends on Air Canada bag rules, YVR transit add-ons, hotel timing and Vancouver's wet-season backup plan.

Comments
Sign in to comment.
No comments yet.