Dishwasher runs but the water stays cold? A safe heating and cleaning checklist
A dishwasher that finishes with cold water may have a simple hot-water or maintenance problem—or a failed heater, sensor, or control. Use this low-risk checklist to separate the checks you can do from the repairs that need a qualified technician.

A dishwasher can sound completely normal and still leave plates greasy, glasses cloudy, and the tub cold at the end of the cycle. That symptom is easy to misread: the machine may be heating normally on one cycle, starting with water that is too cool, or detecting a fault and deliberately disabling its heater. Replacing the heating element is not the first diagnostic step, and opening a built-in appliance to test live circuits is not a sensible beginner repair.
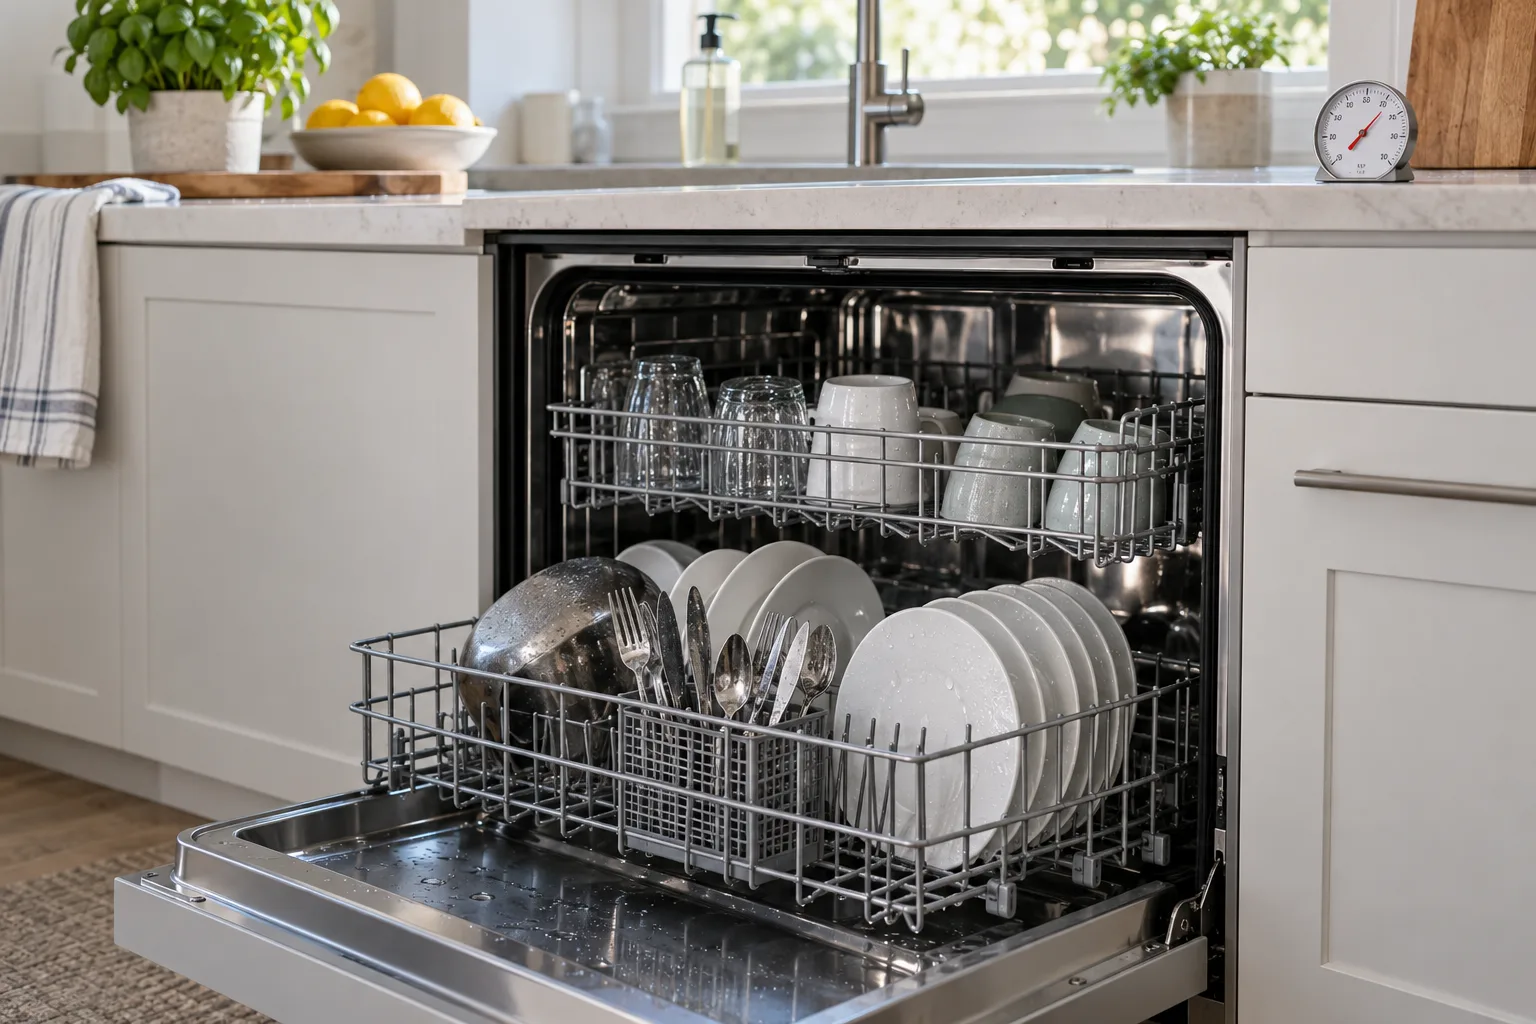
The useful question is not simply, “Is the dishwasher hot?” It is: At what point does the heat problem appear, and what else changed at the same time? A cold final rinse, a cycle that runs much longer than usual, undissolved detergent, poor cleaning, or a new error code each points toward a different next check. Whirlpool notes that cool water can leave food residue and filming behind, while a failed heating element or temperature sensor can keep the machine from reaching its programmed temperature. Whirlpool’s water-temperature guide is a useful manufacturer reference, but the exact temperatures and diagnostic steps vary by model.
This guide focuses on the checks that do not require removing the dishwasher’s panels. It also explains where the safe DIY boundary ends.
What the symptom usually means
Dishwashers commonly use the home’s hot-water supply for the initial fill, then use an internal heater, heat pump, or both to raise the temperature during washing and drying. A dishwasher may therefore feel cold for several different reasons:
- The first fill is coming from a cold or lukewarm supply line.
- The hot-water pipe is correct, but water has been sitting in a long or poorly insulated run.
- The selected cycle uses less heat, or the drying option is not enabled.
- A filter, spray arm, or circulation problem prevents proper washing even though the heater works.
- A temperature sensor, heater, relay, wiring connection, or control board has failed.
- A leak-protection or water-level fault has stopped the appliance from heating.
Do not infer a failed heater from cool dishes alone. Some modern cycles pause or extend themselves while they heat, and some energy-saving programs finish with cooler surfaces than older machines did. Look for a pattern across two comparable cycles, not one quick impression.
A recent discussion in r/BritishSuccess described a dishwasher that stopped heating shortly after its warranty period, but the same discussion also included a report of water escaping during a drain-hose test. That is a useful reminder of the boundary here: a replacement part may solve one fault, while improvised testing can create a flood or electrical hazard. The discussion is anecdotal, not a repair standard.
Before you touch anything: safety rules
A built-in dishwasher combines mains electricity, water, heat, sharp sheet metal, and sometimes a water-detection system in the base. Treat it as an appliance with real injury and property-damage risks.
Stop immediately and arrange professional service if you smell burning plastic, see smoke, find melted wiring, hear repeated arcing or loud electrical buzzing, discover water under the machine, see a damaged power cord, or find that the circuit breaker or GFCI trips again after a reset. Do not keep resetting a breaker to make the appliance run.
Before removing a filter or cleaning the tub, stop the cycle and wait for hot water to cool. Keep hands away from the heater area; even a machine that appears idle may contain hot water or a hot metal element. Wear cut-resistant gloves if your owner’s manual permits filter removal and you are reaching into a pump area. Small pieces of broken glass, bone, and ceramic can be sharp.
Never remove the toe-kick, door panel, junction-box cover, or control-board cover for this checklist. Do not use a multimeter on a dishwasher’s heater, relay, or wiring unless you are trained to work safely around mains circuits and the manufacturer’s service documentation specifically supports the test. Whirlpool’s technical material labels live diagnostic voltage work as a technician task and warns of electric-shock danger. Its service document is not a DIY instruction sheet.
Do not bypass the door latch, float switch, leak sensor, thermal fuse, grounding connection, or any other safety interlock. Do not connect the dishwasher to a cold-water line simply to see whether it will heat. Do not pour drain cleaner into the appliance.
Tools and materials
For the low-risk checks, gather:
- Your dishwasher’s model number and owner’s manual.
- A flashlight.
- A soft brush, sponge, and mild dish soap for cleaning the removable filter.
- A shallow container or towels if the manual says a small amount of residual water may be present.
- A kitchen, candy, or meat thermometer for checking the hot-water supply at the nearest faucet.
- A phone or notebook to record the cycle, symptoms, error code, and approximate time.
You do not need a screwdriver, electrical tester, replacement heater, or access to the control board for the first stage. If a later diagnosis requires those items, that is usually the point to use a qualified appliance technician.
Step 1: Confirm that the symptom is real
Run the dishwasher only after checking the selected program. Choose a normal or heavy cycle described by your manual as using heat. If the machine has separate options for high-temperature wash, sanitize, or heated dry, note whether they are selected; do not assume every cycle uses the same temperature. Some delicate or energy-saving programs intentionally reduce heat.
Do not open the door repeatedly to feel the water. That interrupts the program and makes the observation less useful. Instead, note what happens at the end:
- Are the dishes visibly greasy or coated with detergent?
- Is the tub still wet and cool, or is it warm but not drying?
- Did the cycle take much longer than normal?
- Did the detergent tablet dissolve?
- Did the machine display an error, flash a pattern, or stop before the drying stage?
- Is there standing water in the bottom?
If the dishes are clean but wet, the wash heater may be functioning and the drying system, rinse aid, loading pattern, or selected cycle may be the real issue. If the dishes are dirty and the water is cold, continue with the supply and circulation checks.
Step 2: Check the hot-water supply at the sink
The easiest mistake to correct is starting a dishwasher with a cold first fill. Turn on the hot-water faucet closest to the appliance and let it run until the temperature stops rising. Then start the dishwasher promptly. This sends hot water into the first fill instead of asking the appliance to warm a large volume from room temperature.
Measure the water in a glass if you have a kitchen thermometer. GE says the incoming dishwasher water should be at least 120°F and no more than 150°F for proper cleaning, and it advises confirming that the dishwasher is connected to the hot-water line rather than the cold line. GE’s guidance also notes that a long run from the water heater can leave the first water cooler. Your appliance manual and local plumbing requirements take priority over a generic temperature figure.
If the sink water itself is not hot enough, the dishwasher is not the first thing to repair. Check whether another fixture has recently used hot water, whether the water heater has a problem, or whether the thermostat setting is appropriate. Do not raise a water-heater setting casually if that could create a scalding hazard, conflict with the appliance manual, or affect a shared or rented system.
If the supply is hot at the sink but the dishwasher still receives cool water, stop at the visible checks. A kinked inlet hose, closed valve, blocked inlet screen, faulty inlet valve, or installation error may be involved. The valve is commonly under the sink, but do not disconnect a pressurized hose unless you know how to shut off the water and safely contain it.
Step 3: Check the filter and visible wash area
A clogged filter does not automatically mean the heater has failed, but it can reduce circulation and cleaning performance. Food debris also makes it harder to interpret the symptom. Follow the owner’s manual to remove the filter; designs differ, and forcing a twist-lock filter can break it.
With the dishwasher off and cool:
- Remove the lower rack if necessary.
- Take out the filter exactly as the manual describes.
- Rinse it under running water and use a soft brush to remove grease and trapped particles.
- Inspect the filter mesh for splits, distortion, or a missing seal.
- Look only at the visible pump-cover area for loose debris. Do not dismantle the pump.
- Reinstall the filter fully so it locks into place.
Bosch’s consumer troubleshooting guidance recommends cleaning the filter and checking the pump area when a dishwasher does not drain, while warning that trapped objects may be sharp. Its drain guidance is relevant here because standing water or poor circulation can make a heating complaint look worse.
Check the spray arms next. Make sure each arm turns freely by hand when the machine is empty and off. Look for a blocked jet, a utensil touching the arm, or a large pan preventing rotation. Rinse removable spray arms only if your manual permits it. Do not poke deep into a jet with a metal tool, and do not remove sealed assemblies to chase a blockage.
After cleaning, run a normal cycle with the correct detergent and a sensible load. If the water now heats and the dishes improve, maintenance or circulation was part of the problem. If the machine still completes with cold water, continue.
Step 4: Check the loading, detergent, and rinse aid
Poor loading can produce the same result as a heating fault because water cannot reach the soil properly. Place large items so they do not block the spray arms or detergent dispenser. Avoid nesting bowls and cups tightly together. Keep plastic items away from locations that depend on direct heat, unless the manual says they are dishwasher-safe.
Use only automatic dishwasher detergent, in the amount recommended for your water hardness and product instructions. Hand dish soap can create excessive foam and cause leaks. A tablet that remains intact may indicate a blocked dispenser, a spray-arm problem, a very short cycle, or water that never entered the tub correctly; it is not proof by itself that the heater failed.
Rinse aid affects drying and spotting, not the basic operation of the wash heater. Refill it if the manual recommends it, but do not treat rinse aid as a cure for cold wash water. If the dishes are clean but remain wet, compare the drying option, rinse-aid setting, and material of the dishes before diagnosing a heater.
Step 5: Look for water-level and drain symptoms
A dishwasher cannot heat correctly if it is not filling, circulating, or draining as designed. At the end of a cycle, a small amount of water may be normal on some models, but standing water covering the filter is not something to ignore. Consult the manual for the expected level.
Check only the accessible items:
- The water-supply valve under the sink is open.
- The inlet hose is not visibly kinked.
- The drain hose is not crushed behind the cabinet.
- The sink connection or air gap is not visibly blocked.
- The filter is seated correctly.
- The dishwasher is not showing a leak-protection or water-tap symbol.
Do not pull a built-in dishwasher forward to inspect hoses unless you know how it is secured and how to protect the flooring. A machine may be attached to the counter or side cabinets, and moving it can strain water, drain, or electrical connections.
If the appliance has a water-inlet, drain, or leak-protection code, record the exact code and look it up in the manual for your model. Bosch, for example, lists separate codes for heater faults, water-flow problems, blocked heat-pump systems, and water detected in the base. Its error-code page directs owners to service for several of those conditions rather than encouraging internal testing. See Bosch’s error-code reference.
Step 6: Reset once, then observe
A single reset can clear a temporary control glitch, but it cannot repair a burned heater or failed sensor. Stop the cycle using the normal cancel or drain command if available. Then follow the owner’s manual for a power reset. Depending on the installation, that may mean unplugging the cord from an accessible outlet or switching off the dedicated breaker. Never reach into a wet cabinet to unplug an appliance, and never remove a cover to find the connection.
Leave power off for the interval specified by the manual, restore it, and run one controlled test cycle. Write down whether the machine fills, washes, heats, drains, and dries. If the same code or symptom returns, stop repeating resets. A recurring fault needs diagnosis, not more power cycles.
Step 7: Decide whether the heater really needs service
At this point, a strong service case exists when all of the following are true:
- The nearest hot-water tap reaches the appropriate temperature.
- The dishwasher is connected to the correct supply and visibly fills.
- The filter and spray arms are clean and unobstructed.
- The load and detergent are reasonable.
- The machine completes a comparable cycle with cold water, dirty dishes, or an explicit heating error.
- A single reset did not change the result.
Possible internal causes include a heater, heat-pump heater, temperature sensor, high-limit device, wiring connection, control relay, or electronic control fault. The symptoms overlap, so buying the most obvious part can waste money. On some models, the control intentionally disables the heater after detecting a problem; replacing the heater without finding the original cause may not solve the issue.
Manufacturer advice is deliberately conservative here. Bosch’s consumer pages say that a dishwasher failing to heat may need an engineer visit and advise turning off the appliance and closing the water tap. Whirlpool’s service material identifies heater, high-limit, wiring, and control-board components but labels diagnostic voltage measurements as hazardous technician work. That is the appropriate DIY boundary for a built-in appliance.
When you should call a professional immediately
Arrange qualified service without further experimentation if:
- The breaker, fuse, GFCI, or RCD trips more than once.
- You smell hot insulation, see scorch marks, or find melted plastic.
- Water appears under the dishwasher or in the base tray.
- The unit leaks from a hose, valve, pump, door, or internal seam.
- The door latch, grounding, power cord, or junction box is damaged.
- A leak-protection, heater, temperature, or electrical error returns after a reset.
- The appliance must be pulled out and disconnected to continue.
- You would need to remove a door panel or measure live voltage.
- The machine is under warranty, covered by a service plan, or installed in a rental where the owner must authorize repair.
- The dishwasher is part of a recent renovation or new installation and the connection may be wrong.
A professional should also be involved if the appliance is subject to a recall or safety notice. Check the model and serial number against the manufacturer’s recall page and your national product-safety database before ordering parts. The U.S. Consumer Product Safety Commission maintains a searchable recall and warning database, and the U.S. site SaferProducts.gov allows consumers to search appliance reports and recalls. A recent Japanese Consumer Affairs Agency notice also listed a built-in dishwasher among products involved in serious product-accident reporting, which reinforces the need to check model-specific safety information rather than assuming every heating problem is ordinary wear. The notice is country-specific and does not establish that a particular dishwasher in your home is affected.
How to prepare for the service call
You can reduce the cost and delay of diagnosis without opening the machine. Record:
- The brand, full model number, and serial number.
- The date and cycle when the problem first appeared.
- Whether the water was hot at the nearby faucet.
- Whether the appliance filled, circulated, drained, and dried.
- Any error code, flashing pattern, unusual noise, or leak.
- Whether cleaning the filter or resetting power changed anything.
- Whether the appliance is under warranty or part of a recall.
A short video of the display or an unusual sound can help, provided you film from a dry, safe position and do not remove panels. Keep the old filter, broken rack part, or other accessible component only if the manual says it is replaceable and the service technician asks for it; do not order a heater based on a generic model-family listing.
Repair or replace?
A heater or sensor repair can be reasonable on a relatively young dishwasher with an otherwise sound tub, pump, racks, door seal, and control system. Replacement may make more sense when the unit has several unrelated failures, has a corroded tub, leaks from a sealed assembly, or needs an expensive control board after years of service. The correct decision depends on the actual diagnosis, part availability, labor, installation requirements, and local pricing.
Do not use a “half the replacement cost” rule as if it were universal. A repair estimate that includes a safety inspection and a warranty may be preferable to a cheap part fitted without diagnosing the cause. Conversely, an old machine with repeated leaks and electrical faults may not be a good candidate for another repair.
A compact decision path
Use this order:
- Confirm the cycle and record the symptom.
- Run the nearest hot tap until it is hot, then test one normal cycle.
- Check the visible supply valve, hose, filter, spray arms, loading, detergent, and drain symptoms.
- Perform one manufacturer-approved reset.
- If the machine remains cold or shows a heater, sensor, water-flow, leak, or electrical code, stop and arrange service.
The most useful DIY repair here is often a correction at the supply, filter, or loading stage. The least useful is opening the appliance and guessing at the heating element. A dishwasher that runs without heat is still combining water and mains electricity; once the safe external checks are exhausted, the job belongs with a qualified appliance professional.
Related articles

Typed AI Decisions Could Improve Smart-Home Automation, but They Still Need Hard Limits
TypeSafe’s new Jev model points to a narrower kind of smart-home AI: systems that choose among predefined outcomes instead of improvising control. That could help with comfort automations, provided local policy, manual overrides, and safety checks remain in charge.


The cat wants the sink, not the bowl: water-station fixes and when to worry
A practical reset for bowl placement, fountain choices, cleaning habits and the red flags that belong with a veterinarian, not a shopping cart.

Australia's Solar Sharer turns midday surplus into a household benefit
A three-hour free-power window is not magic; it is a practical test of whether homes can help use renewable energy when the grid has too much of it.

Garbage disposal hums but will not spin? Safe steps before you call a plumber
A safe jam-and-reset checklist for a humming kitchen-sink disposal, with clear limits on when to stop and call a professional.
Comments
Sign in to comment.
No comments yet.