The September Equinox Garden Audit: Test, Drain and Cover Tired Beds Before Winter
After a dry, demanding season, the most useful fall garden job may be an audit rather than a cleanup marathon. Check what the soil is telling you, correct drainage problems safely, and cover only the beds that can still support a useful autumn crop.

The September equinox is a useful deadline for a garden decision that is easy to postpone: what should happen to each bed after a hard summer?
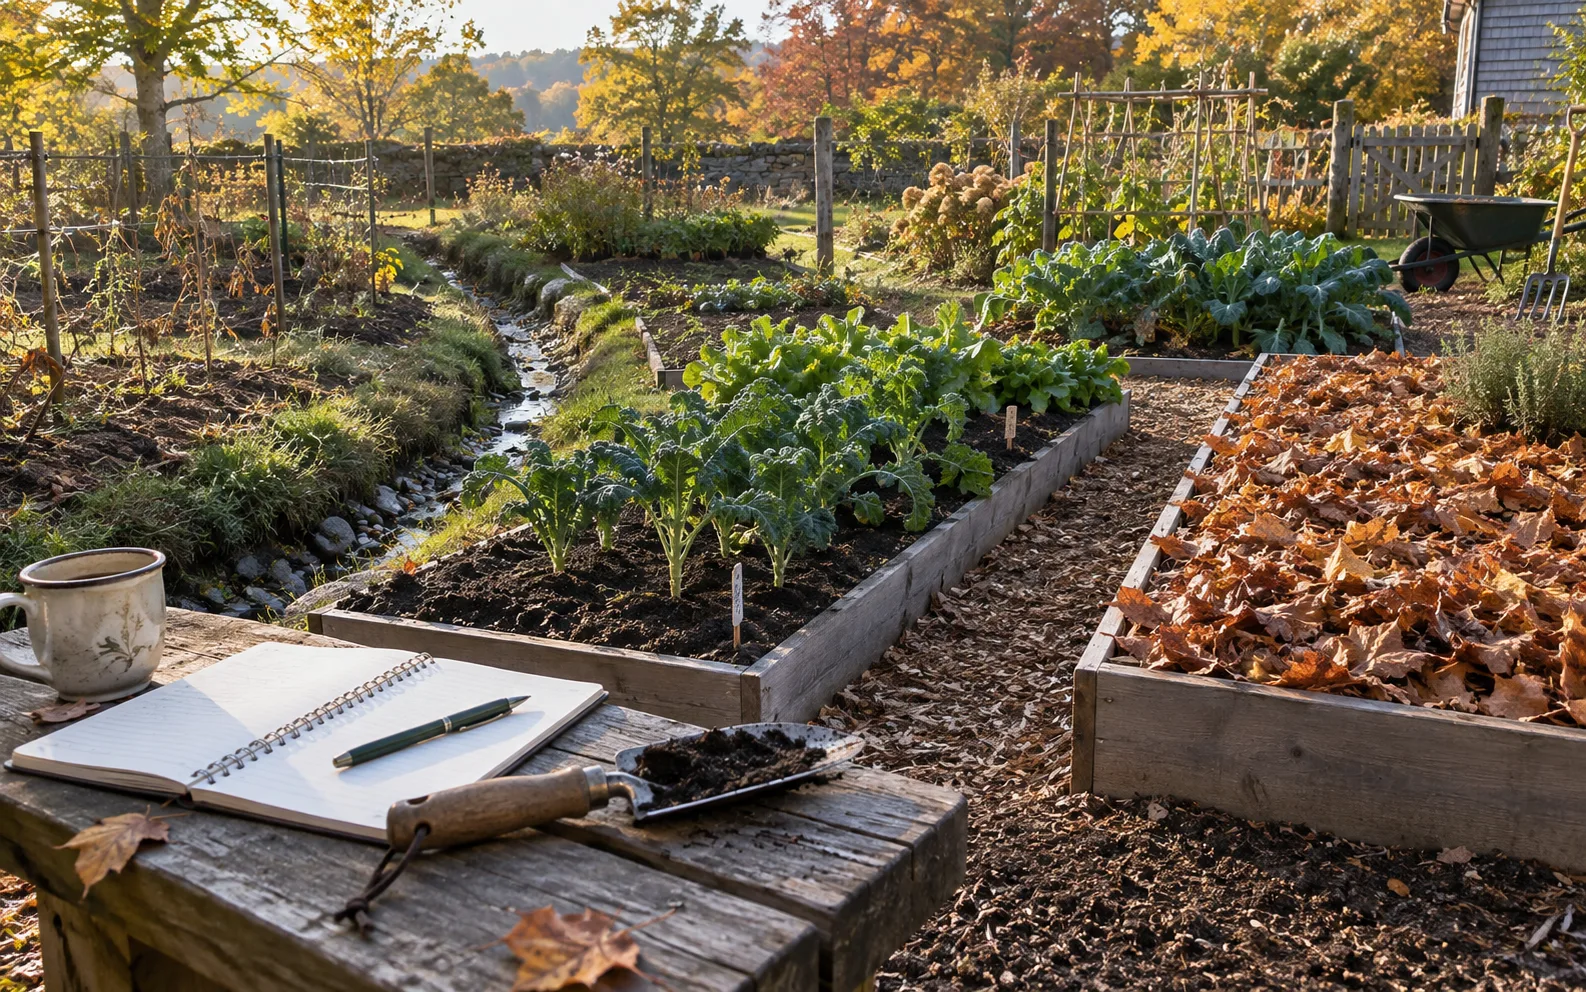
That question matters more this year in places that moved from heat and dry soil into sudden autumn rain. A bed that looks merely untidy may be compacted, low in organic matter, over-fertilized, poorly drained, or simply ready for another crop. Treating every empty patch the same wastes seed, compost, water and time.
The practical response is a short audit. Test representative soil, inspect how water moves, remove material that can carry disease, and then choose one of three endings for each bed: plant a fall crop, establish a cover crop, or protect the surface with mulch and leave it alone.
This is not a universal calendar. The correct date depends on latitude, elevation, first frost, rainfall, soil type and the crop you want next. The equinox is a planning marker, not a command to dig.
Start with a bed-by-bed inventory
Walk the garden with a notebook before buying anything. Divide the growing area into sections that have been managed differently: a tomato bed, a squash bed, a lawn converted recently, a raised bed filled with purchased soil, or a section that receives runoff from a roof or driveway. One soil sample from the whole yard can hide important differences.
For each section, record five observations:
- What grew there, and whether it performed normally.
- Whether irrigation or rainfall ran off, puddled, or disappeared unusually fast.
- Whether roots were shallow, brown, or unusually sparse.
- Whether the surface crusted, cracked, smelled sour, or stayed wet.
- Which plants showed disease, and whether the symptoms were confirmed or only suspected.
Also note where people, wheelbarrows, pets or machinery repeatedly walked. A narrow compacted lane can make a whole bed appear to have a fertility problem because roots cannot explore it evenly. Do not correct that by automatically adding fertilizer. First establish whether the problem is chemical, physical, biological, or simply a crop that was planted in the wrong place.
The University of Minnesota Extension recommends testing garden soil in the fall after harvest as well as in spring. Its guidance treats a soil test as a way to determine pH, texture, organic matter and nutrient levels, and to avoid adding materials the garden does not need. That is especially useful after a season when repeated feeding may have accumulated phosphorus or salts.
Take a soil sample that can answer a real question
A routine laboratory soil test is usually a better fall purchase than another general-purpose fertilizer. Use the instructions supplied by your local extension service, university laboratory or reputable testing provider, because sampling depth and the amount of soil required vary.
For a small bed, take several cores or slices from the same managed area, mix them in a clean plastic bucket, remove stones and plant debris, and submit the required portion. Do not mix lawn soil, compost, a greenhouse container mix and a vegetable bed into one sample. Keep a separate sample for a bed with a different history or visible problem.
Avoid sampling immediately after applying fertilizer, lime, manure or a large amount of compost. Those materials can distort the result. If the question involves possible contamination from an old painted structure, treated timber, ash, industrial fill or a busy road, request the appropriate contaminant test rather than assuming a routine fertility test answers it.
The report should guide the amendment, not decorate it. If pH is suitable and nutrients are already high, adding more compost or a complete fertilizer is not an act of care. It can increase nutrient losses and create problems in nearby water. If pH is low and the report recommends lime, use the stated rate. Lime is not a general soil conditioner and should not be applied simply because a bed has been used for several years.
The same rule applies to fertilizer. A label with a higher analysis is not automatically better. Match the product and rate to the crop, soil test and local recommendations. In a vegetable bed that will be harvested soon, avoid applications that cannot safely be used with the crop or that leave unnecessary nutrients exposed to winter runoff.
Check compaction before reaching for a rototiller
A tired bed is often disturbed more than it needs to be. Repeated tilling can break soil aggregates, expose organic matter and leave a fine surface that crusts after rain. It may temporarily make digging easier without fixing the traffic pattern or poor drainage that caused the trouble.
Do a simple field check when the soil is moist but not saturated. Push a hand trowel or sturdy probe into several locations. Compare the planting row with the places where people walked. Dig a small inspection hole and look at the transition between loose topsoil and the denser layer below. Roots that stop abruptly at a flat, hard boundary suggest compaction; a pale, wet-smelling layer may point toward drainage rather than a lack of fertilizer.
You can also watch what happens during the next moderate rain. Healthy structure does not mean water vanishes instantly. It means the surface accepts water without prolonged ponding, the soil holds some moisture, and excess water can leave without carrying away a sheet of topsoil. The University of Minnesota describes a simple aggregate or slake observation: soil with stable aggregates resists crumbling in water better than soil with weak structure. It is a useful comparison between beds, not a laboratory diagnosis.
If a bed is compacted, keep traffic off it when wet. Loosen only the actual planting zone with a broadfork, garden fork or hand tool, lifting without repeatedly turning the soil over. In a small raised bed, add a narrow permanent path and keep the growing surface within reach. If compaction is deep or caused by construction fill, roots and organic matter will not fix it in one autumn; improve drainage and structure over several seasons, or rebuild the problem section with verified clean soil.
Decide whether the bed can carry another crop
A fall crop is worthwhile only if there is enough growing time, light and moisture for it to establish before cold weather. Cool-season choices commonly include leafy greens, spinach, radishes, turnips, beets, scallions, cilantro, parsley and some brassicas, but the exact list and timing vary sharply by region. Use the seed packet or local extension schedule for your first frost date and the crop’s days to maturity.
Count backward from the expected first killing frost, then add time for germination and slow autumn growth. A packet’s maturity number is often based on favorable conditions, not a shortening day and cool soil. Late September sowing in a mild maritime climate is not equivalent to late September sowing at high elevation or in a northern continental climate.
Choose the most reliable small planting rather than filling every gap. A short row of greens that can be protected with a low tunnel is more useful than a broad sowing that cannot be watered or covered. In regions with cold rain, a cloche, low tunnel or cold frame can protect foliage and moderate temperature, but it must be vented on sunny days and anchored against wind. Do not let plastic touch wet leaves for long periods.
Good drainage is particularly important for fall and winter vegetables. Oregon State University Extension notes that winter gardens need a well-drained location and that raised beds can help where soil stays wet. A raised bed is not a cure for a saturated site if water has nowhere to go; it may simply become a container sitting in a pond. Check the surrounding grade before building higher walls.
Cover crops are useful, but the calendar is not forgiving
Empty beds should not automatically be left bare. Penn State Extension describes cover crops as a way to reduce erosion, hold nutrients, build organic matter, suppress weeds and improve soil conditions. A cover crop can be a good choice when a bed will be unused for several months and you can manage it in spring.
The practical limitation is establishment time. Seed needs contact with moist soil, enough warmth to germinate and enough time to develop before severe cold. Penn State’s guidance for dry falls recommends considering winter hardiness and the latest recommended seeding dates for the local area. If the soil is powder-dry and rain is not expected, sowing a delicate mix and hoping for a storm is not a plan.
Common categories have different trade-offs:
- Cereal grains such as winter rye, wheat or oats can cover ground quickly and contribute substantial residue, but they may be vigorous and can be difficult to manage in a small bed if allowed to mature.
- Legumes such as crimson clover, hairy vetch or winter peas can contribute nitrogen when conditions suit them, but they have regional establishment limits and may need careful termination.
- Brassica cover crops such as radish or turnip can occupy a bed quickly, yet they are not appropriate where crop rotation or disease pressure makes another brassica a poor choice.
For a home garden, choose a species or blend that has clear local instructions for sowing and spring termination. Do not buy a farm-scale mix merely because its bag lists many benefits. Verify the seed’s winter behavior, whether it can become weedy, whether it is permitted or recommended in your region, and how you will kill it without relying on a chemical treatment you are not trained or licensed to use.
Seed into a prepared but not pulverized surface. Remove large diseased plant pieces, rake enough to create contact, sow at the labeled rate, and press or lightly rake the seed in. In a dry fall, a thin surface mulch may help retain moisture, but a heavy layer can block small seedlings. Water gently if local restrictions and supply allow.
When mulch is the better answer
Mulch is the low-risk option for a bed that is too late, too dry or too uncertain for another crop. It protects soil from raindrop impact, slows temperature swings and makes spring preparation easier. Use clean, mature material from a known source. Chopped leaves, finished compost, weed-free plant residue and suitable straw can all work, but they behave differently.
Do not bury thick layers of fresh woody chips in a vegetable bed and expect them to become soil by spring. Keep woody mulch on paths or use it on the surface where appropriate. Avoid material that contains persistent herbicide residues, diseased plants, invasive seed heads or unknown waste. Manure-based compost should be from a reliable source and used according to soil-test needs; compost can contain nutrients, especially phosphorus, and is not nutritionally neutral.
Apply enough to cover bare soil without smothering crowns or burying the stems of perennial plants. Keep mulch away from trunks and woody stems so the base stays dry and visible. In slug-prone areas, inspect beneath boards, pots and thick mulch rather than creating a permanent damp shelter beside vulnerable seedlings.
A thin layer of finished compost can be useful where the soil test or history supports it, but do not use a blanket application as an emotional response to a disappointing harvest. Extension guidance from Minnesota suggests about one-half inch of non-manure compost for vegetable and flower gardens when compost is appropriate, while emphasizing that repeated additions can build phosphorus and other nutrients. Your local recommendation should take precedence.
Sanitation without turning the garden sterile
Remove diseased foliage and fruit that can clearly carry a problem into the next season, especially material with active rot, confirmed blight symptoms or heavy pest infestation. Bag or dispose of it according to local rules when home composting will not reliably destroy the issue. Do not put diseased material into a cool backyard pile and assume time alone makes it safe.
Healthy stems, roots and leaves are different. Chop and leave sound residue as a surface layer if it is not harboring a known disease, or add it to a properly managed compost system. The goal is not a spotless garden. It is to remove likely sources of trouble while keeping useful carbon and habitat on site.
Clean stakes, cages, pruners and harvest tools before storing them. Let tools dry, repair handles, oil suitable metal surfaces and store sharp blades safely. If a plant disease was severe, rotate the affected crop family away from that bed when practical. Rotation cannot solve every soil-borne disease, but repeatedly planting the same susceptible crop in the same location narrows your options.
Do not burn garden waste casually. Smoke, fire spread, local restrictions and the handling of treated or unknown materials make burning a poor default. Check municipal or regional rules for green-waste collection and disposal.
The three-bed decision
By the end of the audit, each section should have a written next action.
Plant. Use this for a bed with adequate remaining season, good drainage and a crop suited to local frost conditions. Prepare only the planting strip, label the sowing date and plan how it will be watered and protected.
Cover. Use this for a bed that will rest through winter and still has enough time and moisture for a locally recommended cover crop. Record the species, sowing date and spring termination plan before you plant.
Mulch and leave. Use this for a bed that is too late, contaminated with a suspected problem, structurally damaged, extremely dry, or scheduled for reconstruction. Covering the surface is not failure. It prevents a rushed decision from becoming a new problem.
This division is more useful than a universal autumn checklist because it connects the work to the bed’s condition. It also controls spending. The first purchases may be a soil test, labels, a hand fork and enough clean mulch—not a shelf of amendments.
A practical weekend schedule
On the first day, map the beds, pull spent annuals, photograph symptoms, clean the tools and collect samples. Do not spread lime, fertilizer or manure while waiting for results unless a local recommendation gives you a specific reason.
On the second day, inspect drainage after rain or use a small controlled watering test on a representative patch. Mark compacted paths, repair leaking irrigation, clear blocked outlets and decide which beds have enough time for a crop. If you use a hose, keep water away from electrical connections and do not work around powered equipment in wet conditions.
During the following week, order only seeds and materials that match the decision for each bed. Establish a cover crop while the local sowing window remains open. Mulch the beds that need protection. Put frost cloth, hoops, clamps and labels where they can actually be found when a cold night arrives.
In late autumn, review what happened. Did water remain in one corner? Did a cover crop establish evenly? Did seedlings disappear under mulch? Did the soil report call for a change that has not yet been made? A two-minute note now prevents the same investigation from starting from zero next year.
Regional caveats that change the advice
In Mediterranean and other dry-summer climates, fall rain may be the main establishment opportunity, but a first storm can be intense enough to wash seed away. Firm the seedbed, avoid sowing directly before heavy rain, and use erosion control on slopes.
In humid regions, drainage, air movement and disease sanitation may matter more than adding organic material. Do not cover wet soil heavily if it stays saturated, and do not assume a raised bed solves a high-water-table problem.
In cold northern climates and high elevations, the window for a new cover crop may already be closed even though the calendar says autumn has just begun. Mulch may be the sounder choice. In mild coastal climates, the same date may still allow several rounds of greens, but pests and winter moisture can become the limiting factors.
Where water restrictions are active, prioritize established perennial plants, newly planted trees and the smallest area that can produce a fall crop. A cover crop that cannot germinate without repeated irrigation may not be the responsible choice for that site. Local water rules override a general gardening schedule.
What not to do after a difficult summer
Do not fertilize every bed because leaves are pale. Pale leaves can reflect root damage, cold soil, drought, disease, poor drainage or a nutrient shortage, and a fertilizer response is not guaranteed.
Do not incorporate large amounts of fresh manure just before growing edible crops. Follow local food-safety and application guidance, and remember that manure can add phosphorus, salts and weed seed as well as organic matter.
Do not till wet soil. The apparent improvement lasts minutes; the compaction can last seasons.
Do not sow an unlabeled seed mixture on the assumption that more species always means more resilience. Species have different termination dates, disease relationships and winter survival.
Do not seal a damp greenhouse or low tunnel without ventilation. Condensation, weak light and poor airflow can turn a season extender into a disease chamber.
Do not treat a soil test as a verdict on your gardening ability. It is a measurement that helps separate a real amendment need from a plausible-sounding guess.
The useful equinox task is therefore modest: make the bed’s next season easier to read. Test what needs testing, keep feet and machinery off wet soil, let drainage determine the design, cover bare ground when the timing supports it, and accept mulch when it does not. A garden does not need every square foot planted before winter. It needs decisions that match the soil, weather and work available at that particular site.
Sources and further reading
- University of Minnesota Extension: Soil testing for lawns and gardens — testing timing, nutrients, organic matter, salts and compost cautions.
- Penn State Extension: Home garden soil management — soil tests, cover crops, raised beds and compost.
- Penn State Extension: Tips for planting cover crops in home gardens — establishment and fall cover-crop choices.
- Penn State Extension: Cover crops in a dry fall — winter hardiness and sowing-window considerations.
- Oregon State University Extension: Growing Your Own — drainage, raised beds and fall/winter vegetable production.
Related articles

The September Sheet-Pan Dinner: A Flexible Roast of Corn, Peppers, Chickpeas and Whatever Needs Using
A practical late-summer-to-early-fall dinner built around one hot tray: sweet corn, peppers, onions and chickpeas become a substantial meal with a crisp topping, a cool sauce and easy substitutions.


The September Android Drop’s Most Useful Changes Are a New Memory for Your Stuff and a Better Way to Read in Motion
Google’s September Android Drop adds remembered items to Find Hub, Motion Assist for passengers, Guided Vision, and new Messages tools. Here is what each feature does, which phones need Android 16 or 17, and what to check before trusting it.


Plitvice Lakes after 3 p.m.: when the cheaper September ticket saves money and when it costs more
Use the €25 September entry only after checking the entrance, boats, panoramic vehicles and ride home; otherwise the €40 morning ticket may be the cheaper trip.
Apple’s September 2026 devices are in stores. The first-day setup is where the upgrade earns its place
The iPhone 18 Pro, Apple Watch Series 12, Ultra 4, and AirPods 5 are now available. The practical decision is not which launch feature sounds best, but which setup, transfer, health, audio, and return checks prevent an expensive mismatch.

Comments
Sign in to comment.
No comments yet.