Home Assistant keeps failing? Start with the storage, not the dashboard
Raspberry Pi and Orange Pi smart-home setups often fail at the least glamorous layer: microSD cards, USB sticks, power supplies and missing backups. Here is how to move toward SSD, Data Disk or a mini PC without losing the house.

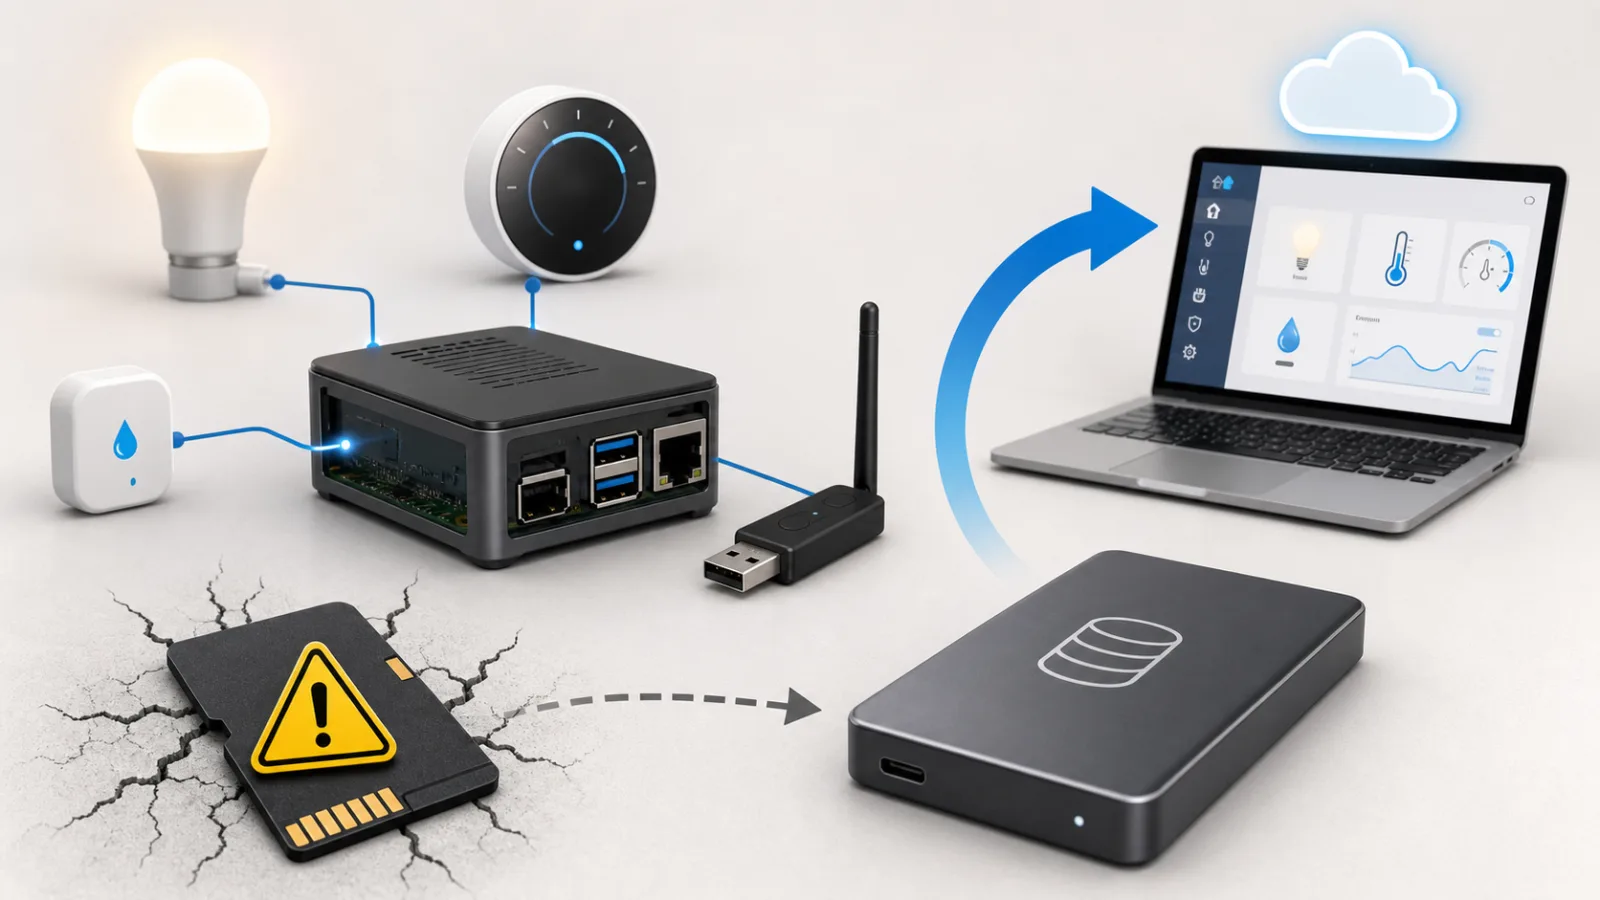
A Home Assistant box usually fails in a very ordinary way. The lights still look paired, the Zigbee dongle is still plugged in, the automations are still written, but the system will not boot cleanly after a power cut or update. Sometimes the database is corrupt. Sometimes the filesystem flips to read-only. Sometimes the log is full of I/O errors and the owner discovers that the smart home was running on the weakest part of the setup: a tiny microSD card or a cheap USB flash drive.
That is not a beginner mistake so much as a beginner trap. The official Raspberry Pi path is deliberately simple: flash Home Assistant OS, insert a microSD card, boot the Pi and start pairing devices. That is the right level of friction for a first install. But a real home does not stay a first install for long. History, energy monitoring, add-ons, backups, camera snapshots, log files and recorder data turn the box into a 24-hour server. Storage and power become part of the smart home, not optional accessories.
The current discussion around Home Assistant storage is not only the old "SD cards wear out" story. Recent Home Assistant OS issues around Raspberry Pi, SSD/NVMe boot, firmware updates and HAOS 18 show a more useful lesson: moving to SSD is usually the right direction, but it is not magic. Power, adapters, USB boot quirks, recorder settings and backups still decide whether the installation is reliable.
Why Home Assistant is hard on weak storage
Home Assistant does not just read configuration files and wait for button presses. It writes constantly. The recorder database stores state history and statistics. Energy dashboards record long-term measurements. Add-ons create their own data. Backups are written locally before they are moved elsewhere. Logs grow. Integrations can be noisy. Cameras and media integrations may add more writes. A simple home with a few bulbs is one thing; a house with thermostats, leak sensors, Zigbee devices, Matter, solar data and presence detection is another.
MicroSD cards can work for a while, especially good A2 or high-endurance cards. Home Assistant's Raspberry Pi documentation still mentions microSD and recommends a card of at least 32 GB, preferably Application Class 2, plus a proper power supply and Ethernet. That is reasonable for an accessible start. It is not a promise that every SD card is a good long-term disk for a busy home server.
Cheap USB flash drives are often worse. Many are designed for occasional file transfer, not continuous random writes. They may look like an upgrade because they are external and larger, but internally they can have weak controllers and poor wear handling. When they fail, they often fail in confusing ways: slow boots, random restarts, database corruption, or a system that works again for a day after a hard reboot and then collapses.
The Home Assistant community has years of threads that follow the same rhythm. A user reports another corrupted SD card, kernel messages such as mmc or block I/O errors, and a system that will not mount correctly. Replies usually converge on the same suspects: card quality, power supply, recorder writes, backups and the need to move data to SSD or boot from SSD entirely.
The symptoms are boring, which is why people miss them
Storage problems rarely announce themselves with a friendly "your card is dying" message. They look like unrelated Home Assistant problems.
The database may become corrupt, often involving home-assistant_v2.db. The system may boot into a partial state and then freeze. Add-ons may refuse to start. The UI may disappear while SSH still works, or the reverse. Logs may mention read-only filesystems, mmc0, blk_update_request, I/O errors, or failed writes during an update. A Raspberry Pi may behave differently after a soft reboot than after being unplugged and powered again.
A recent community example involved a Raspberry Pi 5 with an NVMe hat and a WD_BLACK SN770M. The user reported recurring recorder/database corruption and an installation that became unusable every few days. The first diagnostic question from the community was not "which automation did you write?" It was whether the power supply was good enough. That is the right instinct. Faster storage does not help if the board, hat and drive are underpowered.
Recent GitHub issues around Home Assistant OS add another layer. Users have reported update failures on Raspberry Pi 4 systems booting from SSD, Pi 5 NVMe hat instability, USB3 boot trouble where USB2 works, and firmware update behaviour that depends on cold power cycles rather than soft reboots. These are not reasons to avoid SSD. They are reasons to treat the storage path as hardware engineering, not a checkbox.
The first rule: back up before you optimize
Before moving anything, create a full Home Assistant backup and download it somewhere outside the device. Not just onto the same Pi. Not just onto the same SD card. Put it on a laptop, NAS, cloud drive or another machine you can reach if the Home Assistant box dies.
That one step changes the whole risk profile. Without a backup, every migration becomes surgery. With a backup, a failed migration is annoying but recoverable: flash a clean install, restore the backup, reattach USB devices carefully and continue.
A useful backup plan has three parts. First, regular automatic backups. Second, an external destination such as Google Drive Backup, NAS, SMB, SFTP or another off-device target. Third, an occasional restore test, even if it is only to a spare card or VM. Many people have backups only until the first time they discover the file was stored on the dead disk.
If the system is already unstable, resist the urge to reflash the old card immediately. Try to copy /config, the backup folder and any recent snapshots first. If the only broken piece is the recorder database, you may be able to stop Home Assistant, move home-assistant_v2.db out of the way, and boot with lost history but preserved configuration. That is not ideal, but it is better than losing the whole installation.
Path one: keep the Pi, move the data to SSD
For many Raspberry Pi installations, the cleanest first improvement is not a dramatic rebuild. It is moving the data partition to an external SSD while keeping the installation manageable. Home Assistant OS includes common tasks for using an external data disk, and the documentation warns that USB-attached SSDs can draw enough power to require a stronger power supply or a powered USB hub, especially on older Raspberry Pi models.
The practical sequence is simple, but the order matters. Make and download a full backup. Use a decent SSD, not a promotional thumb drive. Use a known-good USB-SATA or USB-NVMe enclosure. Check power. Attach the SSD directly or through a powered hub if the Pi cannot provide enough current. Move the data disk using the current Home Assistant OS UI or CLI path. Confirm that the data partition, add-ons and database are now on the SSD. Then run the system for a few days before declaring victory.
This path is attractive because it reduces write pressure on the fragile card without forcing every user into USB boot or NVMe hats. It also keeps recovery easier. If the boot media fails later, the data disk and backups may still be intact.
It is not a substitute for backups. It also does not fix bad power, bad cables or a recorder database that has grown without limits. But for a Raspberry Pi that is otherwise stable, SSD as data storage is often the best balance between reliability and simplicity.
Path two: boot completely from SSD or NVMe
Full SSD or NVMe boot makes sense when you want the microSD card out of the system entirely. On a Raspberry Pi 4 or 5, with a suitable adapter or hat and a proper power supply, this can make Home Assistant feel faster and remove a common failure point.
The safe workflow is conservative. Back up first. Update the Raspberry Pi bootloader or EEPROM if needed, following the current Raspberry Pi and Home Assistant OS guidance. Flash the Home Assistant OS image to the SSD or NVMe device. Boot cleanly. Restore the backup. Then watch the logs during the first update cycle.
Do not assume every adapter behaves the same. Some USB-SATA and USB-NVMe bridges handle UASP, power states or boot timing differently. A setup that boots Raspberry Pi OS may still expose quirks with Home Assistant OS. One GitHub issue described a Raspberry Pi 4 revision that booted through USB2 but failed through USB3. Another discussed firmware update procedures for SSD/NVMe installs. A third noted that an EEPROM update may require a cold power cycle to apply. These details matter because a headless smart home box often sits in a cupboard where nobody notices half-applied firmware until the next outage.
NVMe hats add their own variables: mechanical fit, lane configuration, heat, firmware, cable quality and power. A fast NVMe drive is wasted if the board cannot power it reliably. In a smart home controller, boring reliability beats benchmark numbers.
Path three: Orange Pi and other SBCs are not Raspberry Pi clones
Orange Pi boards are tempting. They can be cheaper, faster, or easier to buy than Raspberry Pi models. Some have eMMC or NVMe options. For a Linux-friendly user, they can be perfectly good Home Assistant machines.
The trap is assuming they offer the same Home Assistant OS experience. Community discussions around Orange Pi repeat the same caveat: Home Assistant OS is not officially supported on many Orange Pi models. Home Assistant Container on Debian or Armbian can work, but that is not the same thing as HAOS with Supervisor and add-ons. You gain flexibility and sometimes better hardware value. You lose the simple appliance-like path.
That trade-off is fine if you already like Docker, Linux updates and manual service management. It is less fine if you want the supported Home Assistant appliance experience and expect every add-on guide to match your screen. For that user, Home Assistant Green, Home Assistant Yellow, ODROID-class supported hardware, or a small x86 mini PC may be a calmer choice.
Orange Pi is not bad. It is just not a shortcut unless you know which support layer you are giving up.
Path four: stop fighting the SBC and use a mini PC
Many users eventually do the same math. A Raspberry Pi, official power supply, case, SSD, adapter or NVMe hat, Zigbee extension cable and time spent debugging can approach the cost of a used thin client or mini PC. The mini PC has a normal SSD, UEFI, more RAM, better I/O and fewer USB boot surprises.
The downsides are real. It may use more power. It may take more space. Some models have fans. It can feel like overkill for a few lights and sensors. But for a home where Home Assistant controls heating, security, leak detection or critical automations, overkill can be a feature.
An x86 box also makes testing easier. You can run Home Assistant OS directly, use a VM, or run Container depending on how much appliance behaviour you want. USB passthrough for Zigbee or Z-Wave still deserves care, but the storage story is usually less fragile.
The right answer depends on the home. A small apartment with a few devices can run happily on a Raspberry Pi. A house full of sensors, energy monitoring, cameras and add-ons may be better served by boring x86 hardware and a real SSD.
Recorder tuning helps, but it is not a miracle
The recorder database is one of the biggest write sources, so it is worth managing. Exclude noisy entities that do not need long history. Keep purge settings sane. Watch database size. If you run many integrations, consider whether a separate database such as MariaDB fits your comfort level.
Do not turn this into a ritual for beginners. MariaDB can help in some installations, but it also adds another service to maintain. For many homes, the best first move is simpler: good power, SSD storage, sane recorder exclusions and off-device backups.
History is useful until it becomes the reason the system cannot boot. Keep the data you actually use: energy statistics, climate trends, meaningful sensor history. Do not store every changing attribute forever just because the default made it easy.
The small hardware details matter
A reliable Home Assistant setup is often decided by unglamorous parts. Use a proper power supply. Be careful with PoE hats and the total power budget. Avoid mystery USB enclosures. If possible, choose adapters known to behave well with Raspberry Pi and Linux. Keep cables short and solid. If an SSD behaves strangely on USB3, test USB2 as a diagnostic step even if it is slower.
Keep the Zigbee or Z-Wave dongle away from the SSD and USB3 ports using an extension cable. USB3 noise around 2.4 GHz can make radio networks flaky, and a flaky Zigbee mesh can look like a Home Assistant software problem. Ethernet is preferable to Wi-Fi for the controller. Label the power supply and cables so you do not replace the right part with another random charger six months later.
None of this is glamorous. That is the point. Smart home reliability is mostly boring infrastructure.
If the system is already broken
Start by preserving what remains. Power down cleanly if possible. Clone or copy the old card or disk before experimenting. Try to retrieve /config, backups and any custom files. If the logs point to only a corrupt recorder database, move the database file aside and see whether Home Assistant starts. You may lose history, not the whole home.
If the filesystem is damaged or the disk is throwing I/O errors, do not keep rebooting and hoping. Prepare new storage. Flash a clean Home Assistant OS image. Restore the latest backup. Reconnect Zigbee or Z-Wave devices using the same coordinator where possible so the radio network can survive. Then fix the cause: power, storage, adapter or recorder load.
A rebuild is also a good moment to simplify. Remove abandoned integrations. Reduce recorder noise. Move backups off-device. Document which USB port and extension cable the radio dongle uses. The goal is not a beautiful dashboard on day one. The goal is a system you can recover on a bad evening.
A practical buying checklist
For a new Home Assistant controller, buy the boring parts first. Choose SSD over USB flash. Use a high-quality or endurance-rated microSD only if it is truly a starter setup or boot media. Use the official or properly rated power supply. If the SSD draws power from USB, consider a powered enclosure or hub. Prefer Ethernet. Put the Zigbee dongle on an extension cable. Set up automatic backups to another machine or cloud account before adding dozens of devices.
If you are choosing between Raspberry Pi plus accessories and a mini PC, price the whole package. Pi, case, PSU, SSD, adapter, hat and time are the real cost, not only the board. If you choose Orange Pi, choose it because you are comfortable with Linux and containers, not because you expect a supported HAOS appliance.
Home Assistant can be extremely reliable. But it should be treated like the small server it is. Once it controls lights, heating, locks, alarms or leak sensors, the storage device is no longer a disposable detail. It is part of the home.
Comments
Sign in to comment.
No comments yet.